2-Piece Cookie Cutters: Step-by-Step Guide for Mass Production
July 11, 2026
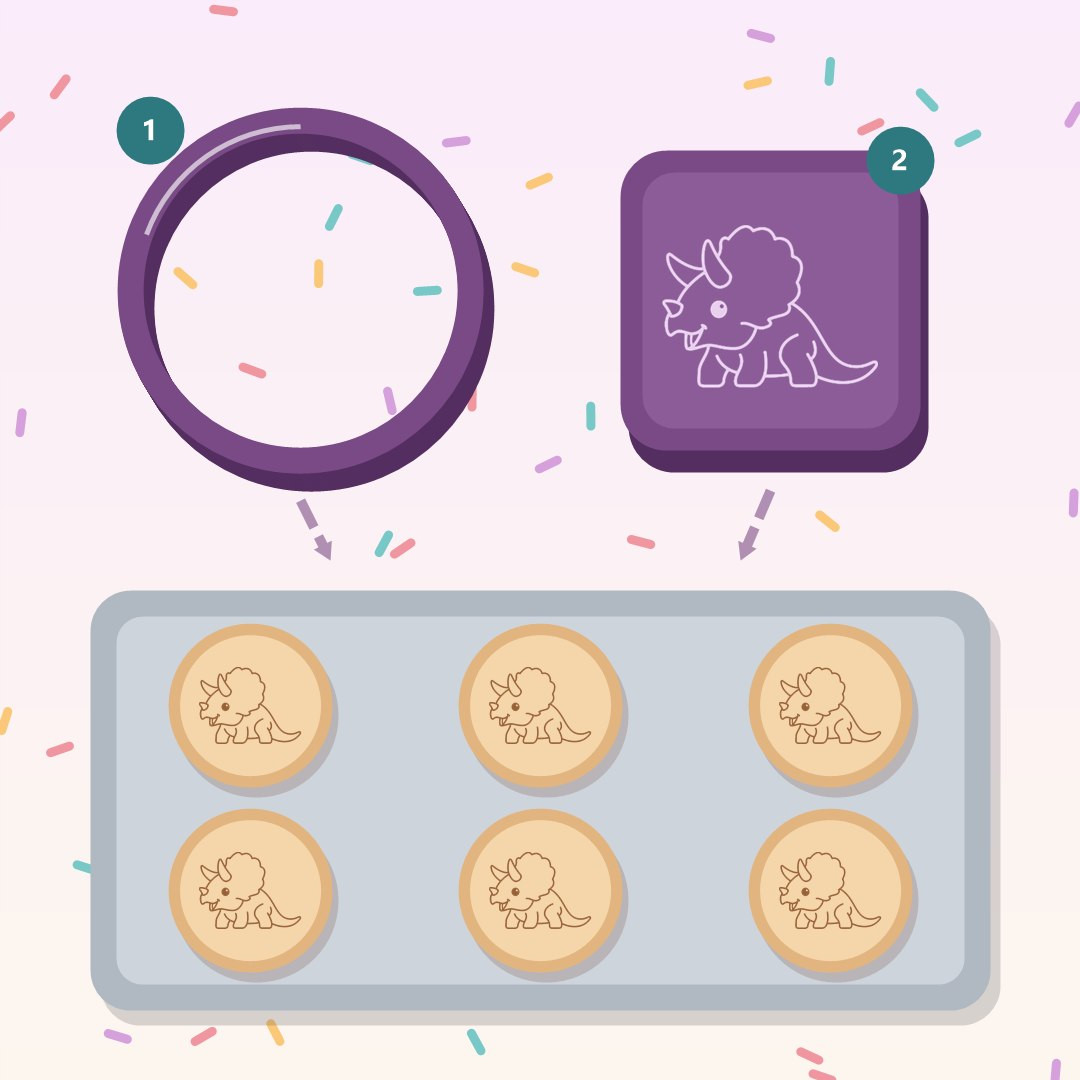
Hello, creative baker! If you already have our two-piece cookie cutters in your tool collection (those that feature a separate outer contour and a detail embossing stamp), you know that the visual results are absolutely gorgeous. However, when you face a large order of 50 or 100 cookies, using this system piece by piece can slow you down if you don't apply the right technique.
Working with independent stamps requires a different strategy compared to traditional cutters. Today, I am going to teach you the mass production method used by professional workshops to emboss and cut at lightning speed, achieving sharp details without the dough ever sticking to the PLA plastic.
Get your rolling pin ready and optimize your time with these simple steps!
1. The Golden Rule: Cold dough, flawless details
The worst enemy of fine-detail embossing stamps is room-temperature butter. If the dough is too warm, pressing the stamp down will pull up parts of the design and ruin the shape.
- The trick: Roll out your dough between two sheets of parchment paper to your usual thickness (we highly recommend 5 mm to 6 mm) and place it in the freezer for at least 15 to 20 minutes before touching it with your digital tools. The dough should feel as rigid as a wooden board.
2. Step 1 in Series: Stamp first, cut later
The most common mistake is taking one cookie, cutting it, stamping it, lifting it, and then moving on to the next. Forget about that! The secret to speed lies in separating the movements:
- Take only the embossing stamp piece.
- Start pressing the stamp firmly across the entire sheet of frozen dough, one right next to the other, maximizing the space. Make all your markings first.
- Since the dough sheet is fully intact and stuck to the paper, it won't stretch or deform when you lift the stamp. You can easily emboss 20 cookies in less than a minute!
3. Step 2 in Series: The perimeter cut in a single run
Once your entire dough looks like a canvas filled with beautiful engravings, it's time to use the second piece of your cutter tool:
- Take the outer contour outline.
- Align the frame with the shapes you already stamped and press down firmly and continuously on each one of them.
- Since the design is already perfectly centered and secured, this step goes incredibly fast because you only need to focus on cutting the clean 7.5 cm perimeters.
4. What to do if the dough starts to stick?
If you are working in a warm kitchen, the dough will inevitably start to soften midway through the process. If you notice the plastic beginning to trap bits of dough inside the small engraved lines, apply these two immediate fixes:
- Cornstarch or powdered sugar: Lightly dip the stamp into a bowl of cornstarch or powdered sugar before pressing it onto the dough. Shake off any excess. This creates an invisible non-stick barrier.
- Express return to the cold: If the dough gets too soft, do not fight it. Pop the sheet back into the freezer for 5 minutes. It is much better to pause for a moment than to spend your time cleaning out the cutter lines with a toothpick.
5. Removing excess dough and baking
Once all the cuts are done, gently peel away the scrap dough left between the shapes. Use a flat baking spatula to lift your shapes and arrange them onto your baking sheet.
? High-production baking tip:
Before putting the baking sheet straight into the oven, chill the cut-out cookies for another 10 minutes. This will freeze the butter once again, ensuring that the fine details pressed by the stamp remain intact and super sharp after baking.
And that's it! By separating the process into an exclusive embossing phase and a cutting phase, you cut the tool handling in half and keep your hands from warming up the tools. You will see your production times drop drastically and your orders ship out much faster.
Do you already work with two-piece cutters in your business or are you afraid of the dough sticking? Share your experience with me down below in the comments!